
Documentation
How to add images in image Bucket
Image bucket is a convenient tool for managing various image formats like jpg, jpeg, and png. It simplifies the process of uploading and organizing images by accepting a wide range of formats.
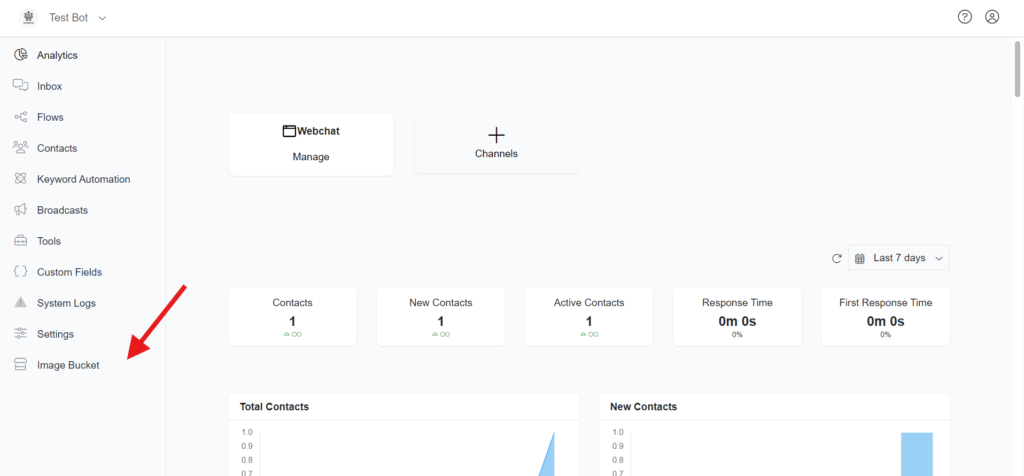
STEP 1 : To access the image bucket, simply click on Image Bucket in the main menu.
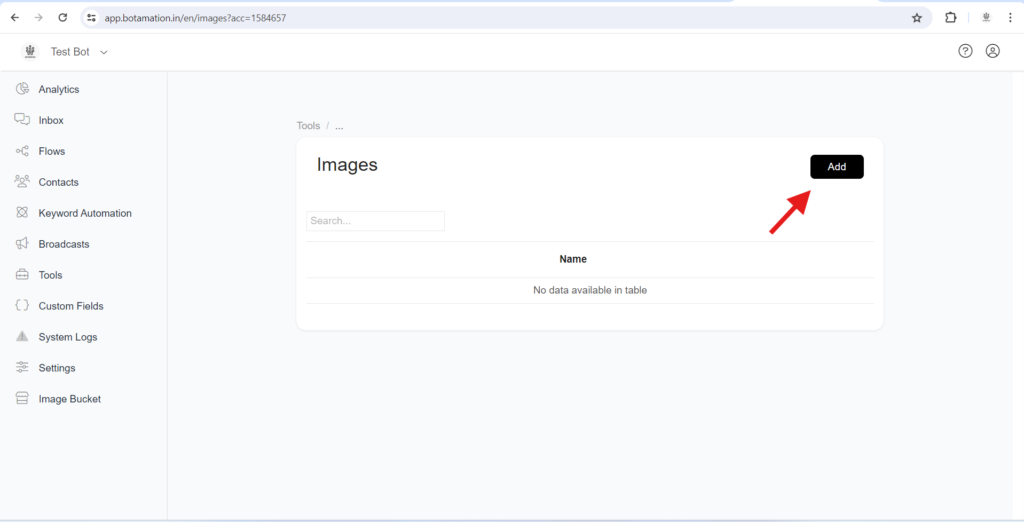
STEP 2 : Click on Add button
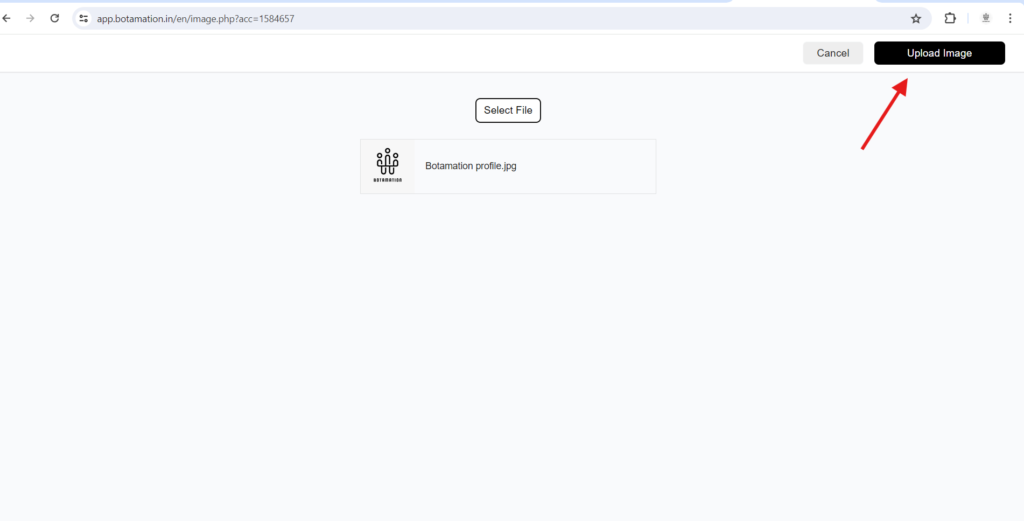
STEP 3 : It will be directed to the page where you can upload the image. Click on Select File
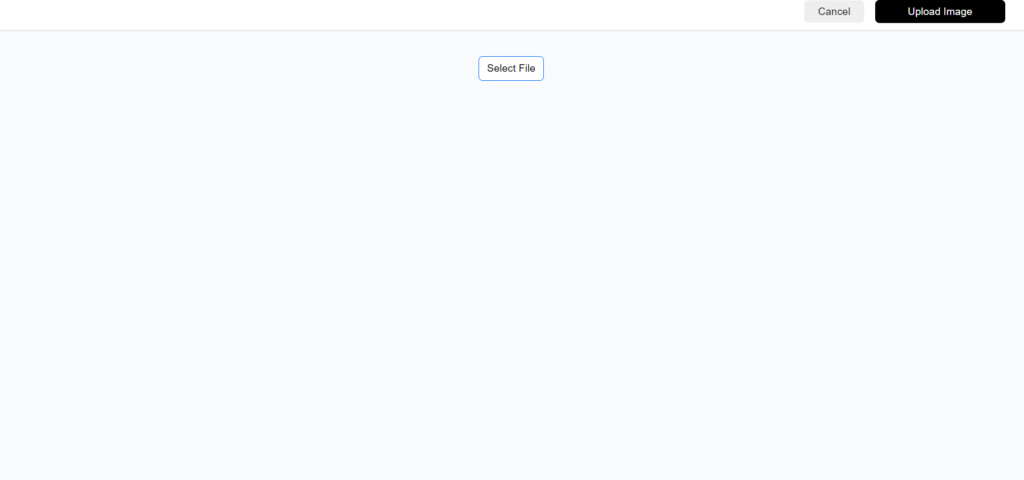
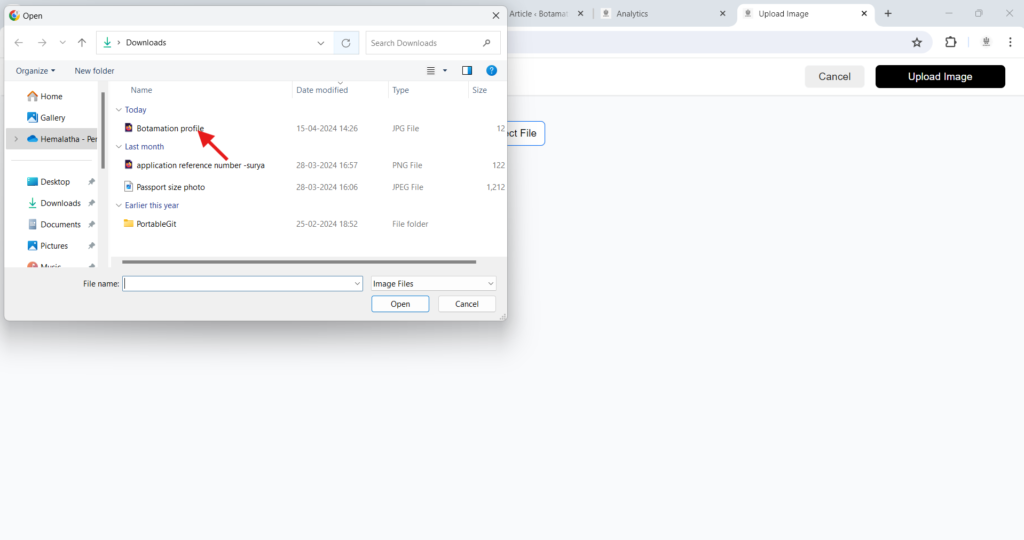
STEP 4 : After clicking Select File, a system popup window will appear, allowing you to choose the file you wants to upload.
STEP 5 : After selecting the file, and then you can click on Upload Image.
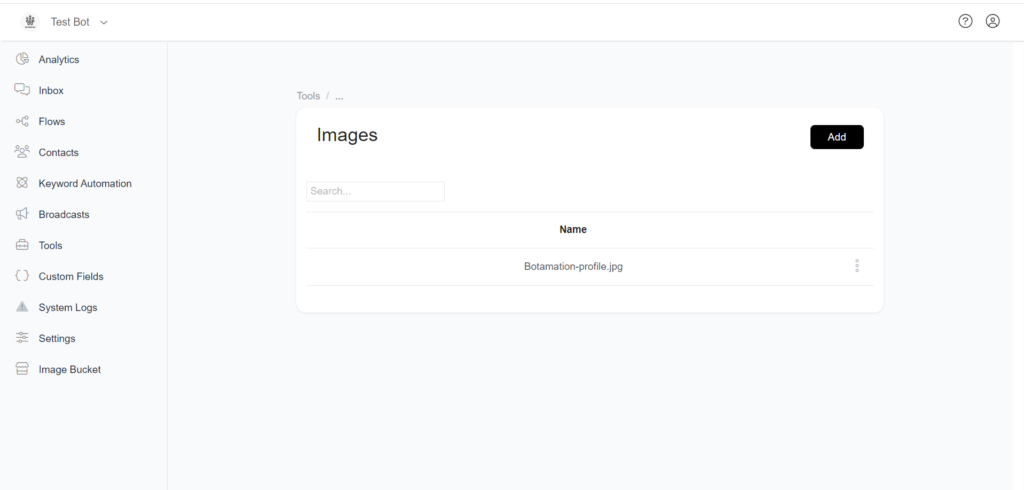
STEP 6 Once you upload an image, you’ll see the file’s name which you have uploaded in the Image Bucket , as shown in the image below